

This article as previous ones (Frame With Padding, Frame Outline Problem, Inheritance from Implicit Styles) also will be about Xamarin.
This time we will inspect Master-Detail page control/mechanism. You can find official documentation for this control here.
Quick spoiler: I never used this in any production application. Why? I will explain. Whole article will be to explain why this is just not worth your time. In this and subsequent articles I will introduce much better solution.
Xamarin MasterDetailPage control
Ok lets get to work. For a test drive lets say we have to do an application that allows user to browse stuff on some online shop. Master-Detail page will be used to allow user switch to a different category of wares. According to documentation user have to introduce only 3 files (at least) to make this work. Since I am lazy I will not create whole menu but only Master view and 3 Detail views (we cannot waste time on creating nice UI just for test right? :))
First main application xaml file:
<?xml version="1.0" encoding="utf-8" ?>
<Application


             x_Class="MasterDetail.App">
  <Application.MainPage>
    <masterDetail:MasterPage />
  </Application.MainPage>
</Application>
This cannot be more straightforward so there is no need to explain. Lets focus on MasterPage view instead:
<?xml version="1.0" encoding="utf-8" ?>
<MasterDetailPage


             x_Class="MasterDetail.MasterPage">
  <MasterDetailPage.Master>
    <ContentPage Title = "Test">
      <StackLayout>
        <Button Text="Detail1" />
        <Button Text="Detail2" />
        <Button Text="Detail3" />
      </StackLayout>
    </ContentPage>
  </MasterDetailPage.Master>
  <MasterDetailPage.Detail>
    <NavigationPage>
      <x:Arguments>
        <masterDetail:Detail1 />
      </x:Arguments>
    </NavigationPage>
  </MasterDetailPage.Detail>
</MasterDetailPage>
This file is a little more complicated but after few seconds it is clear that intention is to have 3 ‘menu’ buttons that send you to different Detail pages.
Single Detail page could look like this:
<?xml version="1.0" encoding="utf-8" ?>
<ContentPage

             x_Class="MasterDetail.Detail1">
  <Label Text="Detail1" VerticalOptions="Center" HorizontalOptions="Center" />
</ContentPage>
Again, nothing interesting just a label to see if correct Detail page is displayed.
Above application will start and display something similar to this:
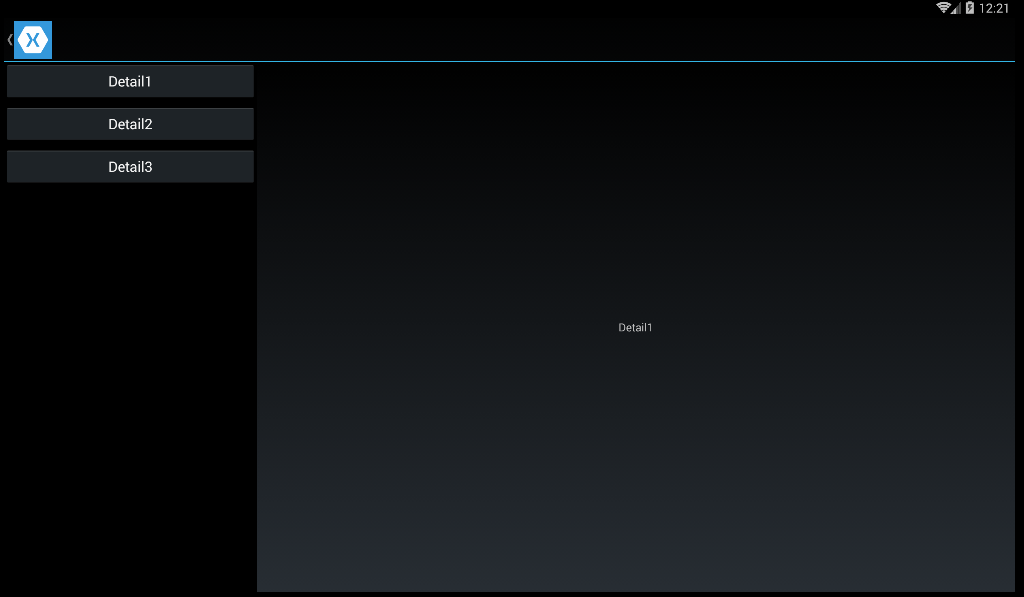
Ok. I lied a little. 🙂 You need one more file to actually make navigation between Detail pages work. Ok lets handle this in MasterPage.xaml.cs code behind and create those details pages. For now two more files will be enough.
using System;
using Xamarin.Forms;

namespace MasterDetail
{
    public partial class MasterPage
    {
        public MasterPage()
        {
            InitializeComponent();
        }

        private void Button1_OnClicked(object sender, EventArgs e)
        {
            Detail = (new Detail1());
        }

        private void Button2_OnClicked(object sender, EventArgs e)
        {
            Detail = new NavigationPage(new Detail2());
        }

        private void Button3_OnClicked(object sender, EventArgs e)
        {
            Detail = new NavigationPage(new Detail3());
        }
    }
}
<?xml version="1.0" encoding="utf-8" ?>
<ContentPage

             x_Class="MasterDetail.Detail3">
  <Label Text="Detail3" VerticalOptions="Center" HorizontalOptions="Center" />
</ContentPage>
<?xml version="1.0" encoding="utf-8" ?>
<ContentPage

             x_Class="MasterDetail.Detail2">
  <Label Text="Detail2" VerticalOptions="Center" HorizontalOptions="Center" />
</ContentPage>
First: code behind that handles navigation. If you will read carefully you will notice some differences in handling detail pages. Two others are almost exactly the same as fist Detail page.
After running that solution you will see that there are really no difference between Detail1 and Detail2.

Why new NavigationPage() then? Because Xamarin documentation says:
The page type is wrapped in a NavigationPage instance in order to ensure that the icon referenced through the Icon property on the MasterPage is shown on the detail page in iOS.
Ok… But what if you do not write for iOS? They do not say. So you have to ensure iOS compatibility… you know just in case. Why you? Should not Xamarin take care of things like that?
Anyway, even after enclosing all of the detail pages inside a NavigationPage (even if just for having exactly the same view layout in all of them) it do not work quite well.
Why? Let us do quick experiment and press back button (if there is one on device) – it will cause application to go into background (or at least it does on Android). What is the cause of that? It works like that because there is change of NavigationPage with every Detail page and NavigationPage is object that handles… well navigation.
Luckily there is a rather easy fix for this too:
namespace MasterDetail
{
    public partial class MasterPage
    {
        public MasterPage()
        {
            InitializeComponent();
        }

        private void Button1_OnClicked(object sender, EventArgs e)
        {
            ChangeDetail(new Detail1());
        }

        private void Button2_OnClicked(object sender, EventArgs e)
        {
            ChangeDetail(new Detail2());
        }

        private void Button3_OnClicked(object sender, EventArgs e)
        {
            ChangeDetail(new Detail3());
        }

        private void ChangeDetail(Page page)
        {
            var navigationPage = Detail as NavigationPage;
            if (navigationPage != null)
            {
                navigationPage.PushAsync(page);
                return;
            }
            Detail = new NavigationPage(page);
        }
    }
}
Since there is a bit of logic involved a new method has been added – ChangeDetail. I think it is self explanatory: we just test if there is already NavigationPage and reuse that one.
This is again code that could be easily (and should be in my opinion) in Xamarin implementation of Detail property. But hey! There is Master-Detail mechanism right? If you unlucky to be unhappy with it – well you are unlucky. Xamarin Team certainly can’t let you have virtual property Detail so you could do that a better way (they have rather unpleasant tendency to have everything internal/closed/sealed).
Let us continue main topic. Just for the sake of an example lets pretend that your manager, or marketing team, or anyone that is using your appm, thinks that application do not need that wide navigation menu. They think that 50 units will suffice and they ask if you can change it. You are starting maybe from setting it in StackLayout:
<StackLayout WidthRequest="50">
  <Button Text="Detail1" Clicked="Button1_OnClicked" />
  <Button Text="Detail2" Clicked="Button2_OnClicked" />
  <Button Text="Detail3" Clicked="Button3_OnClicked" />
</StackLayout>
But if does not work. Ok… Maybe this will work:
<ContentPage Title="Test" WidthRequest="50">
  <StackLayout WidthRequest="50">
    <Button Text="Detail1" Clicked="Button1_OnClicked" />
    <Button Text="Detail2" Clicked="Button2_OnClicked" />
    <Button Text="Detail3" Clicked="Button3_OnClicked" />
  </StackLayout>
</ContentPage>
No. Maybe MasterDetailPage.Master have property for this? Nope. Maybe MasterDetailPage? Nope. You can’t do that. Xamarin developers did not think of that. You would have to forward the information that this change is impossible (or better easily done/would require one week of work :)) for now.
After some time you maybe have another request, but with remark that this is absolutely necessary: menu have to go to the right edge.
You can check if MasterBehaviour property have something that can help you with that and according to documentation its enumeration type have following values:
- Default – The pages are displayed using the platform default.
- Popover – The detail page covers, or partially covers the master page.
- Split – The master page is displayed on the left and the detail page is on the right.
- SplitOnLandscape – A split screen is used when the device is in landscape orientation.
- SplitOnPortrait – A split screen is used when the device is in portrait orientation.
As you see it does not anything helpful. Since there are only four other properties in this control you loose hope and explains to anyone requesting this change that it will need 2 weeks of works since you have to research new solution, implement and test it. At least.
Maybe I am pessimist but there are always changes and they in 90% about adding new features/code instead of removing so it is much more probable that you will have to change how Master and Detail mechanism work because of new requirement/device/theme etc.
Of course you can modify presentation by creating new renderer but it is really complex class and would only solve issues in one platform. No. This is not recommended solution.
All those missing features and inability to configure anything is just only part of the problem. How many times you are writing application with Xaml files that uses only views without any view models? I personnally can’t think of one. Even the smallest applications are written with few views and view models for them. Even models and database for small application are not that rare.
Lets think about above example. You have menu handlers in .xaml.cs file. I almost never use those and instead of them I use commands. Can you use them here? Not really, because you don’t have access to Detail property in different object. You would have to create static property or method at least to allow yourself have access to property that is pretty much whole point of this control.
But static property can not be used in tests (at least easily) so better is to create special interface and have public access to its implementation somewhere. IoC container maybe? If you use this pattern you probably have IoC constructors in some classes, most probably in view models and those can’t be created easily in view click handlers, like in above example, or in ListView.ItemSelected handler like Xamarin documentation suggests.
Best thing is to use commands and some interface in my opinion. This would be easiest thing to do to amend that discrepancy. But lets think of it from other angle.
I am big fan of separating classes in smaller parts for readability, easier maintenance, testability etc. The same thing can in my opinion can be said (to some extent) about xaml files. Can this be done in MasterPage.xaml file? For example you will decide to extract from there Master page and put it in Menu.xaml. Can you do that? Not easily because you can not move ButtonX_OnClicked handlers easily because they depend of MasterDetailPage.Detail property. Of course you can create interface the same as with view model problem, but again it shows that MasterDetailPage control creates more problems then it solves.
After reading about this control I decided not to use it because all of things covered above. In fact in my opinion this control is pretty much useless, But what to use instead?
ContentTemplate and ContentPresenter
First idea is to use newly added features of templating mechanism by ContentTemplate and ContentPresenter.
Let us add new button to MasterPage.xaml file:
<Button Text="Detail4" Clicked="Button4_OnClicked" />
To create ContentTemplate we have to add just one item to resources in our application, preferably in App.xaml:
<Application.Resources>
  <ResourceDictionary>
    <ControlTemplate x_Key="DetailTemplate">
      <Grid>
        <Grid.ColumnDefinitions>
          <ColumnDefinition Width="250"></ColumnDefinition>
          <ColumnDefinition Width="*"></ColumnDefinition>
        </Grid.ColumnDefinitions>
        <StackLayout BackgroundColor="Red">
          <Button Text="Detail1"></Button>
          <Button Text="Detail2"></Button>
          <Button Text="Detail3"></Button>
        </StackLayout>
        <ContentPresenter Grid.Column="1">

        </ContentPresenter>
      </Grid>
    </ControlTemplate>
  </ResourceDictionary>
</Application.Resources>
There is only 3 buttons just to show that it is different view. Red background is for the same thing. There is no handling of buttons because of the problems with MasterDetailPage control explained above. It is just a demo for templating mechanism.
Creating forth detail page called Detail4 like this:
<?xml version="1.0" encoding="utf-8" ?>
<ContentPage

             x_Class="MasterDetail.Detail4"
             ControlTemplate="{StaticResource DetailTemplate}">
  <Label Text="Detail4" VerticalOptions="Center" HorizontalOptions="Center" />
</ContentPage>
is enough for now.
Last thing is to handle button click MasterPage.xaml.cs:
private void Button4_OnClicked(object sender, EventArgs e)
{
    App.Current.MainPage = new Detail4();
}
Yes this is also handled in xaml code behind file, but since this uses static App.Current property it can be easily moved to view model command property.
After running and trying out new button we will see something like this.
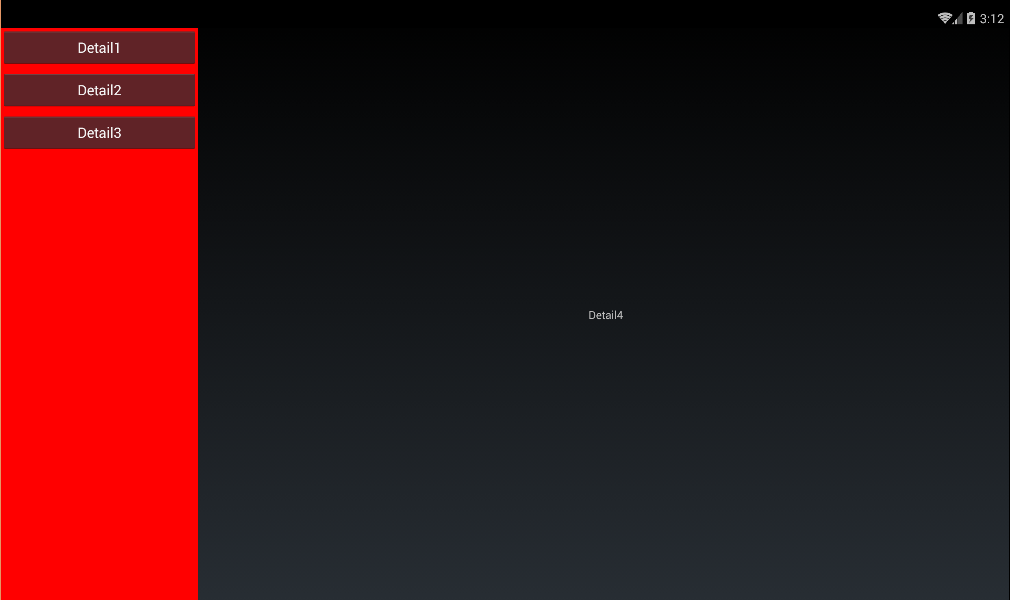
We have 250 width, red background. We can edit this view in every way possible for any page. We will do not have any problems with previous example change requests.
But there is other problem. What if we will have use state somehow in a way of coloring or disabling current page button? It is not that easy. Since it is a template and not separate control we can’t have different BindingContext for menu and Detail page. The same view model for both sooner or later will cause some problems and it will not be most obvious one, using the same view model for all or maybe different ones but with the same values for menu?
More complex problems will be caused by complexity of menu. If you will have to i.e. 2-level menu and collapse, expand sub menus user will almost sure will see that every time after opening new detail page.
This mechanism is more usable for theming application, reusing some external library control with styles for every application etc.
If not templates then what?
Custom MasterDetail control
Yes. If you want job done well, do it your self.
First of all, requirements:
1. Control should have default view model.
2. Changing detail pages must be handled from view models.
3. Control should be created once.
4. Control should handle back button.
5. View should be allowed to override when neccessary.
Seems easy, right? 🙂
Lets start with creating App.xamlfile and its code behind file:
<?xml version="1.0" encoding="utf-8" ?>
<Application

             x_Class="CustomMasterDetail.App">
</Application>
namespace CustomMasterDetail
{
    public partial class App
    {
        public App()
        {
            InitializeComponent();
            MainPage = new MasterDetail();
        }
    }
}
Simple right? To make this correct we have to also create this MasterDetail class. But since view model is required, let us start there:
using System.ComponentModel;
using System.Runtime.CompilerServices;

namespace CustomMasterDetail.ViewModel
{
    public class MasterDetailViewModel : INotifyPropertyChanged
    {
        public event PropertyChangedEventHandler PropertyChanged;

        protected virtual void OnPropertyChanged([CallerMemberName] string propertyName = null)
        {
            var handler = PropertyChanged;
            if (handler != null) handler(this, new PropertyChangedEventArgs(propertyName));
        }
    }
}
For now this can be any view model – it is just a minimal base implementation. We need to add Detail property:
private View _detail;
public View Detail
{
    get { return _detail; }
    set
    {
        _detail = value;
        OnPropertyChanged();
    }
}
If you wondering about OnPropertyChange call, yes it will be binded. It is not clearest implementation of View-ViewModel pattern but it is clear and simple and it will be enough for now.
Ok. Lets jump to view. We will start with simple xaml page:
<?xml version="1.0" encoding="utf-8" ?>
<ContentPage

             x_Class="CustomMasterDetail.MasterDetail">
</ContentPage>
There are two things missing:
- Menu
- Detail page presentation
To add them we need to create xaml definition for first and BindableProperty for second one. We will start with second one.
public readonly BindableProperty DetailProperty = BindableProperty.Create("Detail",typeof(ContentPage));

public ContentPage Detail
{
    get { return (ContentPage)GetValue(DetailProperty); }
    set { SetValue(DetailProperty, value); }
}
There is one thing that might be confusing. Detail property type is a ContentPage because of example simplicity. It could be also View because this is base type of any control that could be root of detail page layout (Grid, StackLayout etc.). Page would be also doable but it would require some magic to obtain root view from i.e. CarouselPage and still allow user to use its navigation features.
We will get back to this topic.
Menu will be the same as in previous examples.
<Grid>
    <Grid.ColumnDefinitions>
        <ColumnDefinition Width="250" />
        <ColumnDefinition Width="*" />
    </Grid.ColumnDefinitions>
    <StackLayout Grid.Column="0">
        <Button Text="Detail1" />
        <Button Text="Detail2" />
        <Button Text="Detail3" />
    </StackLayout>
</Grid>
Grid control allows us to add menu and detail page and controls how they are connected in very simple but yet powerful way.
We need to connect Detail properties of control and view model and we can do that with simple binding:
public MasterDetail()
{
    InitializeComponent();
    SetBinding(DetailProperty, new Binding("Detail", BindingMode.OneWay));
}
We need to do this in a code behind and not in xaml because xaml operate in base class context and we need this in our class. Yes we could do this in other xaml file (in this case in App.xaml) but then we had to do this every single time we would use this control, which would really defeat whole purpose of creating separate control
Now we can define where Detail page will be in our layout and it will be second column of Grid. Of course this can any other place in Master page – top, right, bottom. You can even create multiple parts of master page that are permanently visible, in every detail page. Doing this way you can create i.e. extra properties in master view model and in detail view models that allows you hide, show this other parts, change displayed text, add buttons and etc. This is why it is better to do it this way instead of using Xamarin poor control.
<Grid>
    <Grid.ColumnDefinitions>
        <ColumnDefinition Width="250" />
        <ColumnDefinition Width="*" />
    </Grid.ColumnDefinitions>
    <StackLayout Grid.Column="0">
        <Button Text="Detail1" />
        <Button Text="Detail2" />
        <Button Text="Detail3" />
    </StackLayout>
    <ContentView Grid.Column="1" x_Name="DetailContainer" />
</Grid>
Change of view model property. triggers change of View property. which is handled in BindableProperty definition via propertyChanged parameter:
public readonly BindableProperty DetailProperty = BindableProperty.Create("Detail",
    typeof(ContentPage), typeof(MasterDetailControl),
    propertyChanged: (bindable, value, newValue) =>
    {
        var masterPage = (MasterDetailControl)bindable;
        View content;
        var contentPage = (ContentPage)newValue;
        if (contentPage != null)
        {
            content = contentPage.Content;
            content.BindingContext = contentPage.BindingContext;
        }
        else content = null;
        masterPage.DetailContainer.Content = content;
        masterPage.OnPropertyChanged("SideContentVisible");
    });
Now it is much clearer why there is ContentPage type used for Detail properties in view and view model – this type have Content property, which is set as Content of our newly added ContentView control named DetailContainer. It is important to mark why there is assignment of content BindingContext property – without it this value (in masterPage.DetailContainer.Content) would be resolved to parent value, which would be MasterDetailControl.BindingContext. We do not want that. Instead there is assigned directly detail view model to it, which is what is expected when you edit detail page xaml – it suppose to be this page view model.
Ok. As you can see we have easily configurable layout of control, Detail page easily accessible from ViewModel. However we do not have required support for INavigation interface right?
Let’s take care of it now. Easiest way will be to add this interface to view model:
public MasterDetailViewModel(INavigation navigation)
{
     _navigation = navigation;
}

private Stack _pages = new Stack();

public void InsertPageBefore(Page page, Page before)
{
    if (_pages.Contains(before))
    {
        var list = _pages.ToList();
        var indexOfBefore = list.IndexOf(before);
        list.Insert(indexOfBefore, page);
        _pages = new Stack(list);
    }
    else
    {
        _navigation.InsertPageBefore(page, before);
    }
}

public Task PopAsync()
{
    Page page = null;
    if (_pages.Count > 0)
    {
        page = _pages.Pop();
        _detail = page;
        OnPropertyChanged("Detail");
    }
    return page != null ? Task.FromResult(page) : _navigation.PopAsync();
}

public Task PopAsync(bool animated)
{
    Page page = null;
    if (_pages.Count > 0)
    {
        page = _pages.Pop();
        _detail = page;
        OnPropertyChanged("Detail");
    }
    return page != null ? Task.FromResult(page) : _navigation.PopAsync(animated);
}

public Task PopModalAsync()
{
    return _navigation.PopModalAsync();
}

public Task PopModalAsync(bool animated)
{
    return _navigation.PopModalAsync(animated);
}

public Task PopToRootAsync()
{
    var firstPage = _navigation.NavigationStack[0];
    if (firstPage is MasterDetail
        || firstPage.GetType() == typeof(MasterDetail))
    {
        _pages = new Stack(new[] { _pages.FirstOrDefault() });
        return Task.FromResult(firstPage);
    }
    return _navigation.PopToRootAsync();
}

public Task PopToRootAsync(bool animated)
{

    var firstPage = _navigation.NavigationStack[0];
    if (firstPage is MasterDetail
        || firstPage.GetType() == typeof(MasterDetail))
    {
        _pages = new Stack(new[] { _pages.FirstOrDefault() });
        return Task.FromResult(firstPage);
    }
    return _navigation.PopToRootAsync(animated);
}

public Task PushAsync(Page page)
{
    Detail = page;
    return Task.FromResult(page);
}

public Task PushAsync(Page page, bool animated)
{
    Detail = page;
    return Task.FromResult(page);
}

public Task PushModalAsync(Page page)
{
    return _navigation.PushModalAsync(page);
}

public Task PushModalAsync(Page page, bool animated)
{
    return _navigation.PushModalAsync(page, animated);
}

public void RemovePage(Page page)
{
    if (_pages.Contains(page))
    {
        var list = _pages.ToList();
        list.Remove(page);
        _pages = new Stack(list);
    }
    _navigation.RemovePage(page);
}

public IReadOnlyList ModalStack { get { return _navigation.ModalStack; } }

public IReadOnlyList NavigationStack
{
    get
    {
        if (_pages.Count == 0)
        {
            return _navigation.NavigationStack;
        }
        var implPages = _navigation.NavigationStack;
        MasterDetail master = null;
        var beforeMaster = implPages.TakeWhile(d =>
        {
            master = d as MasterDetail;
            return d is MasterDetail || d.GetType() == typeof(MasterDetail);
        }).ToList();
        beforeMaster.AddRange(_pages);
        beforeMaster.AddRange(implPages.Where(d => !beforeMaster.Contains(d)
            && d != master));
        return new ReadOnlyCollection(_navigation.NavigationStack.ToList());
    }
}
It may look a little complicated but most important are only 2 methods, PushAsync and PopAsync for navigation inside an application. Modal windows functionality is just redirected to Xamarin implementation of interface. ModalStack and NavigationStack properties may be usable sometimes. First just unifies Xamarin stack and MasterPage stack (from _pages field) into one. Rest of interface is not really helpfull in most of applications, but it is implemented as ax example even if would be possible to implement only PopAsync and PushAsync methods or even creating simpler interface only for navigation inside MasterPage.
With that kind of implementation of INavigation interface we can use it inside of OnBackButtonPressed override in MasterPage:
protected override bool OnBackButtonPressed()
{
    var viewModel = BindingContext as MasterDetailViewModel;
    if (viewModel != null)
    {
        var navigation = (INavigation)viewModel;
        navigation.PopAsync();
        return true;
    }
    return base.OnBackButtonPressed();
}
Above code fulfils our requirements. MasterDetail.xaml is easy to change and it is created only once. MasterDetailViewModel is specific view model for control and its INavigation implementation makes detail page navigation easily available from outside of control. The same interface allows handling of backbutton in control.
Next thing to do: it would be nice to have MasterDetail control in reusable portable library.
MasterDetailControl in PCL library
Placing our new control in separate PCL (Portable Class Library), allow to reuse it in multiple applications. It is very useful if you have multiple applications with similar themes. Then it is possible to place whole theme in single PCL.
Lets start with creating PCL project i.e. named CustomMasterDetailControl. We need to add xaml file and view model class to this project. Most of that code will be copied from previous example.
First, xaml file MasterDetailControl.
<?xml version="1.0" encoding="utf-8"?>

<ContentPage

                x_Class="CustomMasterDetailControl.MasterDetailControl">
    <Grid>
        <Grid.ColumnDefinitions>
            <ColumnDefinition Width="250" />
            <ColumnDefinition Width="*" />
        </Grid.ColumnDefinitions>
        <StackLayout Grid.Column="0" x_Name="SideContentContainer" />
        <ContentView Grid.Column="1" x_Name="DetailContainer" />
    </Grid>
</ContentPage>
There is one change from previous version. Instead of having menu in StackLayout control we just assigning name to this control so now it is available in code behind.
public partial class MasterDetailControl
{
    public static readonly BindableProperty SideContentProperty = BindableProperty.Create("SideContent",
        typeof(View), typeof(MasterDetailControl), null, propertyChanged: (bindable, value, newValue) =>
        {
            var control = (MasterDetailControl)bindable;
            control.SideContentContainer.Children.Clear();
            control.SideContentContainer.Children.Add(control.SideContent);
        });

    public readonly BindableProperty DetailProperty = BindableProperty.Create("Detail",
    typeof(ContentPage), typeof(MasterDetailControl),
    propertyChanged: (bindable, value, newValue) =>
    {
        var masterPage = (MasterDetailControl)bindable;
        masterPage.DetailContainer.Content = newValue != null ?
            ((ContentPage)newValue).Content : null;
    });

    public MasterDetailControl()
    {
        InitializeComponent();
        SetBinding(DetailProperty, new Binding("Detail", BindingMode.OneWay));
    }

    public ContentPage Detail
    {
        get { return (ContentPage)GetValue(DetailProperty); }
        set { SetValue(DetailProperty, value); }
    }

    public View SideContent
    {
        get { return (View)GetValue(SideContentProperty); }
        set { SetValue(SideContentProperty, value); }
    }

    public static Page Create<TView, TViewModel>() where TView : MasterDetailControl, new()
        where TViewModel : MasterDetailControlViewModel, new()
    {
        var masterDetail = new TView();
        var navigationPage = new NavigationPage(masterDetail);
        var viewModel = new TViewModel();
        viewModel.SetNavigation(navigationPage.Navigation);
        masterDetail.BindingContext = viewModel;
        return navigationPage;
    }

    protected override bool OnBackButtonPressed()
    {
        var viewModel = BindingContext as MasterDetailControlViewModel;
        if (viewModel != null)
        {
            var navigation = (INavigation)viewModel;
            navigation.PopAsync();
            return true;
        }
        return base.OnBackButtonPressed();
    }
}
With Bindable property defined like this we can override side content of MasterDetailControl in our every application like this:
<MasterDetailControl.SideContent>
    <StackLayout>
        <Button Text="Detail1" Command="{Binding ToDetail1}" />
        <Button Text="Detail2" Command="{Binding ToDetail2}" />
        <Button Text="Detail3" Command="{Binding ToDetail3}" />
    </StackLayout>
</MasterDetailControl.SideContent>
Very easy and intuitive.
There is also new method that should be used to create instance of our control and override view model type for it:
public static Page Create<TView, TViewModel>() where TView : MasterDetailControl, new()
    where TViewModel : MasterDetailControlViewModel, new()
{
    var masterDetail = new TView();
    var navigationPage = new NavigationPage(masterDetail);
    var viewModel = new TViewModel();
    viewModel.SetNavigation(navigationPage.Navigation);
    masterDetail.BindingContext = viewModel;
    return navigationPage;
}
This method contains logic that was previously in App.xaml.cs file:
public App()
{
    InitializeComponent();
    var masterDetail = new MasterDetail();
    var navigationPage = new NavigationPage(masterDetail);
    MainPage = navigationPage;
    masterDetail.BindingContext = new MasterDetailViewModel(navigationPage.Navigation);
}
However there is no point in forcing this code in every application. Instead we can use new method in following way:
public App()
{
    InitializeComponent();
    MainPage = MasterDetailControl.Create<MasterDetail, MasterDetailViewModel>();
}
Best way to set MainPage of application in my opinion would be to set it in xaml file of App class, but this would force as to i.e. rewrite our control so it would derive from NavigationPage instead and then add the same Bindable properties to this new type to propagate those values to our actual control. I do not think that getting rid one line in code justifies that kind of complexity.
Of course if MasterDetailViewModel class do not have parameterless constructor (because of IoC i.e.) we can create new method that takes instance of view model type and change previous overload a little:
public static Page Create<TView, TViewModel>() where TView : MasterDetailControl, new()
    where TViewModel : MasterDetailControlViewModel, new()
{
    return Create<TView, TViewModel>(new TViewModel());
}

public static Page Create<TView, TViewModel>(TViewModel viewModel) where TView : MasterDetailControl, new()
    where TViewModel : MasterDetailControlViewModel
{
    var masterDetail = new TView();
    var navigationPage = new NavigationPage(masterDetail);
    viewModel.SetNavigation(navigationPage.Navigation);
    masterDetail.BindingContext = viewModel;
    return navigationPage;
}
Now lets focus on base class for new control view model: MasterDetailControlViewModel. It is almost the same as in previous example, but it do not contain any logic that handles side menu functionality.
public class MasterDetailControlViewModel : INotifyPropertyChanged, INavigation
{
    private Page _detail;
    private INavigation _navigation;

    private Stack<Page> _pages = new Stack<Page>();

    public event PropertyChangedEventHandler PropertyChanged;

    public Page Detail
    {
        get { return _detail; }
        set
        {
            if (_detail != value)
            {
                _pages.Push(Detail);
                _detail = value;
                OnPropertyChanged();
            }
        }
    }

    public IReadOnlyList<Page> ModalStack { get { return _navigation.ModalStack; } }

    public IReadOnlyList<Page> NavigationStack
    {
        get
        {
            if (_pages.Count == 0)
            {
                return _navigation.NavigationStack;
            }
            var implPages = _navigation.NavigationStack;
            MasterDetailControl master = null;
            var beforeMaster = implPages.TakeWhile(d =>
            {
                master = d as MasterDetailControl;
                return master != null || d.GetType() == typeof(MasterDetailControl);
            }).ToList();
            beforeMaster.AddRange(_pages);
            beforeMaster.AddRange(implPages.Where(d => !beforeMaster.Contains(d)
                && d != master));
            return new ReadOnlyCollection<Page>(_navigation.NavigationStack.ToList());
        }
    }

    public void InsertPageBefore(Page page, Page before)
    {
        if (_pages.Contains(before))
        {
            var list = _pages.ToList();
            var indexOfBefore = list.IndexOf(before);
            list.Insert(indexOfBefore, page);
            _pages = new Stack<Page>(list);
        }
        else
        {
            _navigation.InsertPageBefore(page, before);
        }
    }

    public Task<Page> PopAsync()
    {
        Page page = null;
        if (_pages.Count > 0)
        {
            page = _pages.Pop();
            _detail = page;
            OnPropertyChanged("Detail");
        }
        return page != null ? Task.FromResult(page) : _navigation.PopAsync();
    }

    public Task<Page> PopAsync(bool animated)
    {
        Page page = null;
        if (_pages.Count > 0)
        {
            page = _pages.Pop();
            _detail = page;
            OnPropertyChanged("Detail");
        }
        return page != null ? Task.FromResult(page) : _navigation.PopAsync(animated);
    }

    public Task<Page> PopModalAsync()
    {
        return _navigation.PopModalAsync();
    }

    public Task<Page> PopModalAsync(bool animated)
    {
        return _navigation.PopModalAsync(animated);
    }

    public Task PopToRootAsync()
    {
        var firstPage = _navigation.NavigationStack[0];
        if (firstPage is MasterDetailControl
            || firstPage.GetType() == typeof(MasterDetailControl))
        {
            _pages = new Stack<Page>(new[] { _pages.FirstOrDefault() });
            return Task.FromResult(firstPage);
        }
        return _navigation.PopToRootAsync();
    }

    public Task PopToRootAsync(bool animated)
    {
        var firstPage = _navigation.NavigationStack[0];
        if (firstPage is MasterDetailControl
            || firstPage.GetType() == typeof(MasterDetailControl))
        {
            _pages = new Stack<Page>(new[] { _pages.FirstOrDefault() });
            return Task.FromResult(firstPage);
        }
        return _navigation.PopToRootAsync(animated);
    }

    public Task PushAsync(Page page)
    {
        Detail = page;
        return Task.FromResult(page);
    }

    public Task PushAsync(Page page, bool animated)
    {
        Detail = page;
        return Task.FromResult(page);
    }

    public Task PushModalAsync(Page page)
    {
        return _navigation.PushModalAsync(page);
    }

    public Task PushModalAsync(Page page, bool animated)
    {
        return _navigation.PushModalAsync(page, animated);
    }

    public void RemovePage(Page page)
    {
        if (_pages.Contains(page))
        {
            var list = _pages.ToList();
            list.Remove(page);
            _pages = new Stack<Page>(list);
        }
        _navigation.RemovePage(page);
    }

    public void SetNavigation(INavigation navigation)
    {
        _navigation = navigation;
    }

    protected virtual void OnPropertyChanged([CallerMemberName] string propertyName = null)
    {
        var handler = PropertyChanged;
        if (handler != null) handler(this, new PropertyChangedEventArgs(propertyName));
    }
}
Anything that will involve siide menu will be in application specific code view model. Application will contains from the same detail views.
<?xml version="1.0" encoding="utf-8" ?>
<ContentPage

             x_Class="CustomMasterDetail2.DetailX">
  <Label Text="DetailX" VerticalOptions="Center" HorizontalOptions="Center" />
</ContentPage>
App.xaml file is also the same and most of its code behind was shown above.
<?xml version="1.0" encoding="utf-8" ?>
<Application

             x_Class="CustomMasterDetail2.App">
</Application>
using CustomMasterDetailControl;

namespace CustomMasterDetail2
{
    public partial class App
    {
        public App()
        {
            InitializeComponent();
            MainPage = MasterDetailControl.Create<MasterDetail, MasterDetailViewModel>();
        }
    }
}
MasterDetail.xaml file is application specific implementation of control and contains menu (the same as in previous example).
<?xml version="1.0" encoding="utf-8" ?>
<masterDetail:MasterDetailControl


    x_Class="CustomMasterDetail2.MasterDetail">
    <masterDetail:MasterDetailControl.SideContent>
        <StackLayout>
            <Button Text="Detail1" Command="{Binding ToDetail1}" />
            <Button Text="Detail2" Command="{Binding ToDetail2}" />
            <Button Text="Detail3" Command="{Binding ToDetail3}" />
        </StackLayout>
    </masterDetail:MasterDetailControl.SideContent>
</masterDetail:MasterDetailControl>
Menu logic is of course contained in view model, MasterDetailViewModel class.
public class MasterDetailViewModel : MasterDetailControlViewModel
{
    private ICommand _toDetail1;
    private ICommand _toDetail2;
    private ICommand _toDetail3;

    public ICommand ToDetail1
    {
        get
        {
            return _toDetail1 ?? (_toDetail1 = new Command(OnToDetail1));
        }
    }

    public ICommand ToDetail2
    {
        get
        {
            return _toDetail2 ?? (_toDetail2 = new Command(OnToDetail2));
        }
    }

    public ICommand ToDetail3
    {
        get
        {
            return _toDetail3 ?? (_toDetail3 = new Command(OnToDetail3));
        }
    }

    private void OnToDetail1()
    {
        Detail = new Detail1();
    }

    private void OnToDetail2()
    {
        Detail = new Detail2();
    }

    private void OnToDetail3()
    {
        Detail = new Detail3();
    }
}
After running this application effect will be the same as in previous one.
Best thing about this solution is great possibilities of configuration. In MasterDetailControl.xaml you can change anything you want: layout, widths, heights of elements, adds new bars on top or bottom, etc.
For example if we would want to hide menu on some detail pages, we can add new property to our control:
public bool SideContentVisible
{
    get { return Detail.SideContentVisible; }
}
Obviously for this to work there is need for above property SideContentVisible in detail page. Since our details are just ContentPage class instances we need to create new base class for details. Best way is to put it in PCL library along to our MasterDetailControl class.
public class DetailPage : ContentPage
{
    public DetailPage()
    {
        SideContentVisible = true;
    }

    public bool SideContentVisible { get; set; }
}
Obviously we need to change base classes of all details for this work. It is sometimes unnecessary or not desired, so let’s change property in master detail control instead.
public bool IsMenuVisible
{
    get
    {
        var detailPage = Detail as DetailPage;
        if (detailPage != null)
        {
            return detailPage.SideContentVisible;
        }
        return true;
    }
}
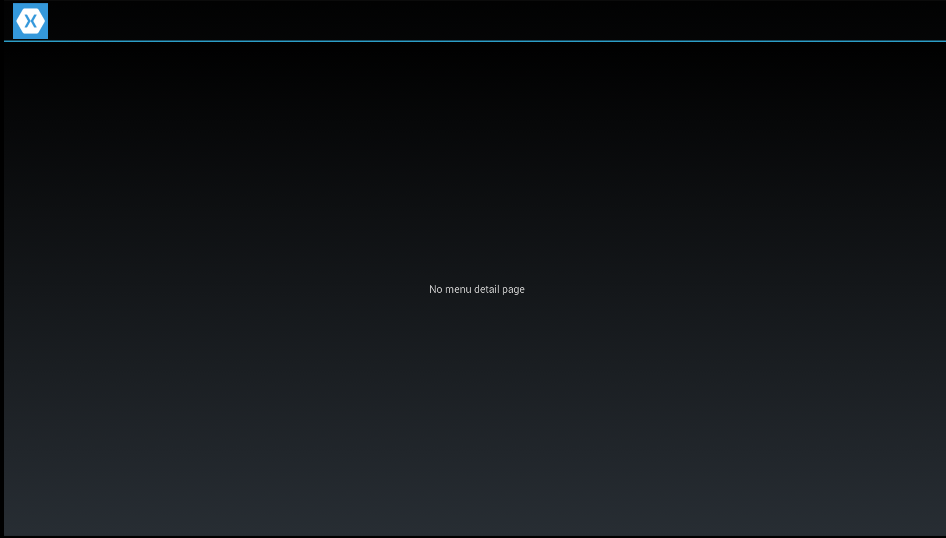
This will handle ContentPage details to – menu visibility will just default to true. We can now create new detail called i.e. NoMenuDetail.xaml:
<?xml version="1.0" encoding="utf-8" ?>
<masterDetail:DetailPage


                         x_Class="CustomMasterDetail2.NoMenuDetail"
                         SideContentVisible="False">
  <Label Text="No menu detail page" VerticalOptions="Center" HorizontalOptions="Center" />
</masterDetail:DetailPage>
We need only to add new menu item to application MasterDetail.xaml and handle this item command in view model.
<Button Text="NoMenuDetail" Command="{Binding ToNoMenuDetail}" />
private ICommand _toNoMenuDetail;

public ICommand ToNoMenuDetail
{
    get
    {
        return _toNoMenuDetail ?? (_toNoMenuDetail = new Command(OnToNoMenuDetail));
    }
}

private void OnToNoMenuDetail()
{
    Detail = new NoMenuDetail();
}
We need, of course, to create appropriate binding for this in MasterDetailControl.xaml and notify about property change, everytime Detail property changes.
<?xml version="1.0" encoding="utf-8"?>

<ContentPage

             x_Class="CustomMasterDetailControl.MasterDetailControl"
             x_Name="Parent">
  <Grid>
    <Grid.ColumnDefinitions>
      <ColumnDefinition Width="Auto" />
      <ColumnDefinition Width="*" />
    </Grid.ColumnDefinitions>
    <StackLayout Grid.Column="0" x_Name="SideContentContainer"
                 WidthRequest="250"
                 IsVisible="{Binding SideContentVisible, Source={x:Reference Name=Parent}}" />
    <ContentView Grid.Column="1" x_Name="DetailContainer" />
  </Grid>
</ContentPage>
Binding is done by referencing control by its xaml name “Parent”, which allows us to use it for binding source. It is impossible any other way in Xamaring without custom IMarkupExtension implementation (but I strongly encourage you to do that :)). Another thing, that is worth to explain, is Auto width of side content Grid column. Without that change this column would take space even if its content would be invisible. Width of 250 is moved to WidthRequest property of StackLayout that serve as a container for menu.
Notification about SideContentVisible property change should be done every time detail changes and it involves only one line in DetailProperty declaration.
public readonly BindableProperty DetailProperty = BindableProperty.Create("Detail",
    typeof(ContentPage), typeof(MasterDetailControl),
    propertyChanged: (bindable, value, newValue) =>
    {
        var masterPage = (MasterDetailControl)bindable;
        masterPage.DetailContainer.Content = newValue != null ?
            ((ContentPage)newValue).Content : null;
        masterPage.OnPropertyChanged("SideContentVisible");
    });
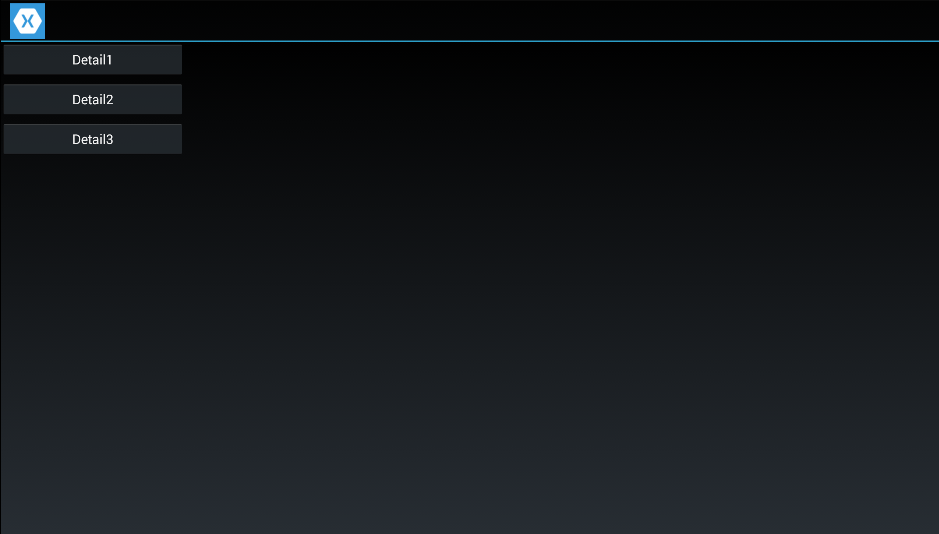
After running changed code we will see on mobile device screen something like this:
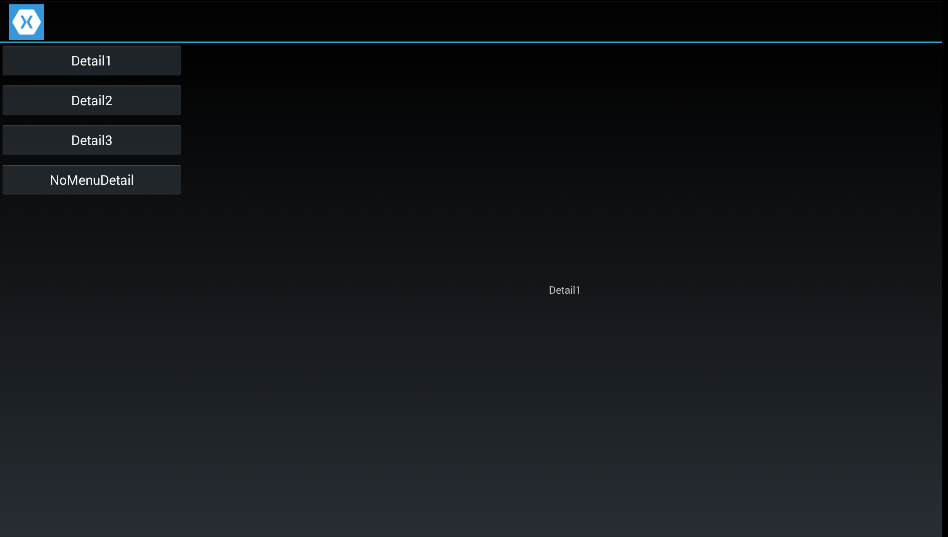
After clicking on new menu item menu will disapper:
Summary
Above examples can serve as a base to create more specific controls thanks to great flexibility of this solution. It is defined by developer and it is tottally open in contrast to Xamarin native solution with it internal functionality, not accesible to end user of Xamarin. Since navigation really happens in view model it is much more viable for bigger applications that in most cases do not have parameterless constructors for view models and other classes. Base classes for control and its view model handles basic functionality, which can be extened very easily, so there is no need to do it every time in every single application. Control is created only once, which helps conserve memory. This would be impossible if every single page had the same menu. Oh, and it handles back button well :).
Sample applications with code examples used in this article you can find here: XamarinSamples.zip (94.48 kb)
Also there is available public github repository with code for this article and previous ones from Xamarin series.
Some features might still be missing or few things might be handled better. For example navigation from view model could be done by creating view models instead of views. This is better pattern and it is much simpler since navigation requires creating only one instance of view model instead of view and view model (at least in final application logic code). This would need some mechanism for finding out proper view for view model and/or registration mechanism for those pairs. Also it would be much easier to have the same navigation for detail pages and simple, whole screen content pages. For this detail pages can identified by base class DetailPage. This would create nice and simple navigation for every page via just view models regardless of specifics of a layout of views (which should not be connected to application logic anyway).
I will cover those topics in next article.